Nuxt 3 + Tailwind + Eslint + i18n + Sentry Starter

This short tutorial will help you set up a scalable Nuxt 3 boilerplate for small and large projects. Find out more about the configuration that Localazy uses for their website and build your next project on proven and solid ground.
Nuxt 3 is nearing the stable release, bringing many great new features to test out and benefit from. As the team states, the deployments are up to 75 times smaller compared to v2, everything runs much faster (both production and development), and the Composition API approach allows for more extensibility and flexibility than ever. All of that is powered by Vue 3 with native TypesScript and ESM support.
However, with such a giant leap, most of the guides on the internet have become obsolete, and content creators and developers need to step up to provide up-to-date examples. In this article, I will guide you through the initial setup we're currently using at Localazy. Do note that the Nuxt v3 is still developing, and some of the steps outlined here might not work in the future. All the packages and configurations have been tested on the Nuxt version 3.0.0-rc.6.
Here is the final repository with all the tools and modules installed.
🧰 Setup Overview
For our Nuxt 3 starter, we'll install tools and modules I find invaluable for small and, especially, large projects. Naturally, you'll need additional packages for your particular project, but the following tools should facilitate your development efforts every time.
Tailwind CSS
A utility-first CSS framework created to build modern websites rapidly. Not only does it provide you with 99% of the CSS classes you'll ever need, but it also has native support for responsive classes, pseudo-classes, and more. It's also super lightweight as it drops unused classes during the build process that are not used in the production version.
Eslint
Eslint is a highly configurable static code analysis that can identify problematic patterns in your javascript files. With the right plugins and extensions, it can also scan your Vue/Nuxt files and enforce a unified coding style across your development team.
I18n
This is an abbreviation for internationalization and stands for means of adapting computer software to different languages. This is a crucial aspect of any product that aims to become successful outside your country's borders. Remember, having your product in English only is not enough.
Currently, the popular @nuxtjs/i18n module for Nuxt v2 is not yet stable for v3. Therefore, we're going to use the @intlify/nuxt3 package, which is an extension of vue-i18n-next for Nuxt. It does not support route localization and SEO i18n enhancement, but this can be developed independently if you need it.
Sentry
Sentry is an application monitoring and error tracking software that supports over 30 coding languages. It helps developers track down issues and optimize their code's performance. There isn't a better way to annoy your users than by having them face the same issues repeatedly. Sentry helps you identify those problems quickly and gives you enough information to fix them.
💚 Create the Nuxt project
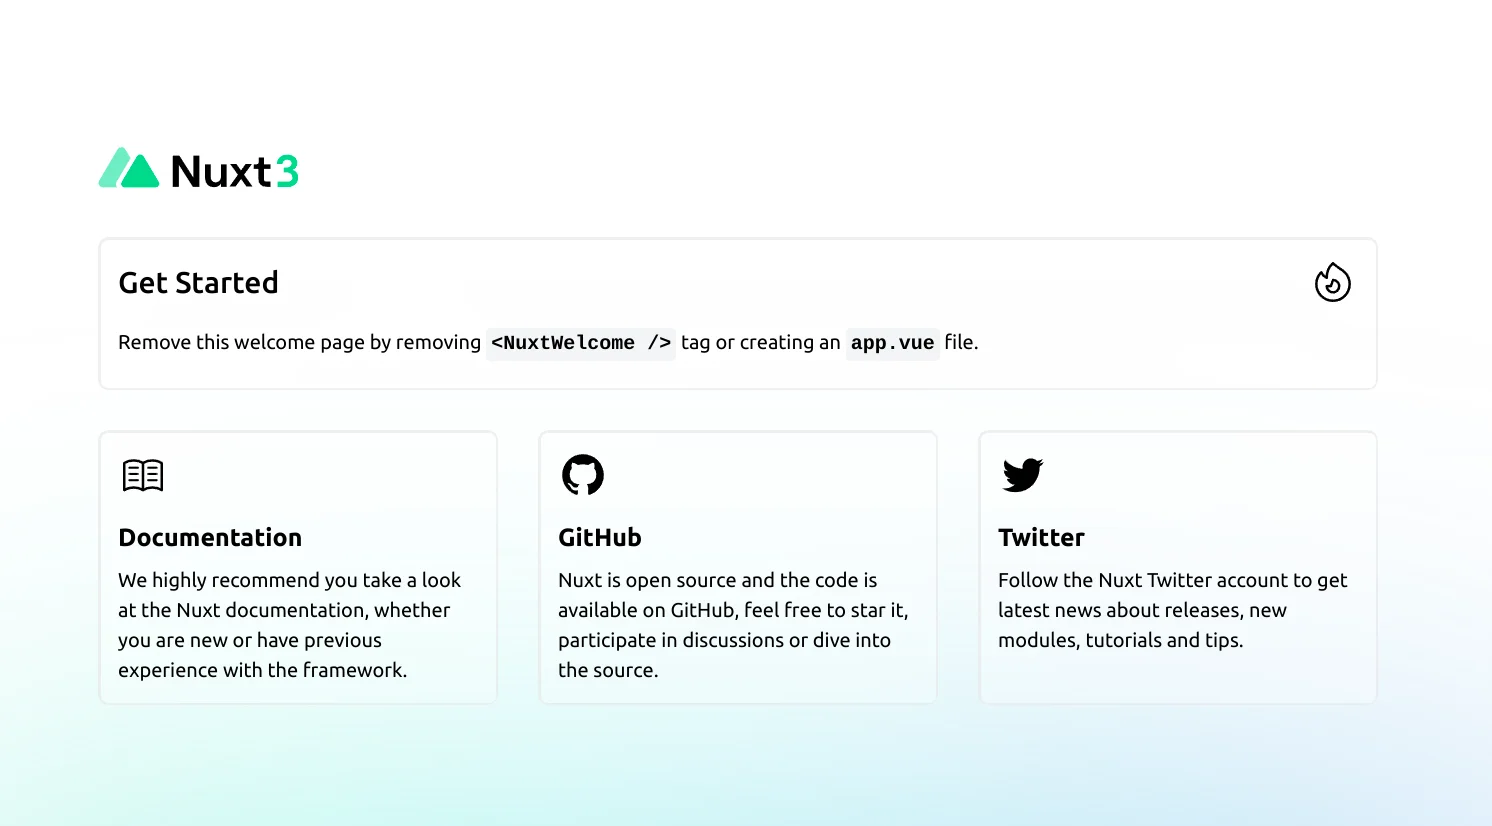
Let's start by creating a new Nuxt project. The team has made it extremely easy this time, and we'll have the basic boilerplate project up and running with just three lines of code.
npx nuxi init nuxt3-starter
cd localazy-nuxt3
npm i
This process should be fast as the base project does not include almost any dependencies. Run npm run dev to start the development server.
📌 Add Eslint
First, install the dev dependencies
npm i -D eslint @typescript-eslint/eslint-plugin @typescript-eslint/parser eslint-plugin-nuxt eslint-plugin-vue
Then create .eslintrc.js file in the root of your project and paste in the following:
// .eslintrc.js
module.exports = {
  env: {
    browser: true,
    es2021: true,
    node: true,
  },
  extends: [
    "plugin:@typescript-eslint/recommended",
    "plugin:nuxt/recommended",
    "plugin:vue/vue3-recommended",
  ],
  parserOptions: {
    ecmaVersion: "latest",
    parser: "@typescript-eslint/parser",
    sourceType: "module",
  },
  plugins: ["@typescript-eslint"],
  rules: {

  },
};
The rule extensions we're using are plugin:@typescript-eslint, plugin:nuxt/recommended, [plugin:vue/vue3-recommended](). Personally, I find that these three extensions are enough to enforce an enjoyable code style while pointing out the most pressing issues. When combined with Volar for VS Code for support of TypeScript in Single File Components, it is a setup that can speed up your development tremendously.
The configuration above is enough to catch the code errors and styling issues in your IDE. However, if you'd like, you can propagate these errors into the browser as well through the vite-plugin-eslint for Vue 3's Vite server (learn more about Vite here).
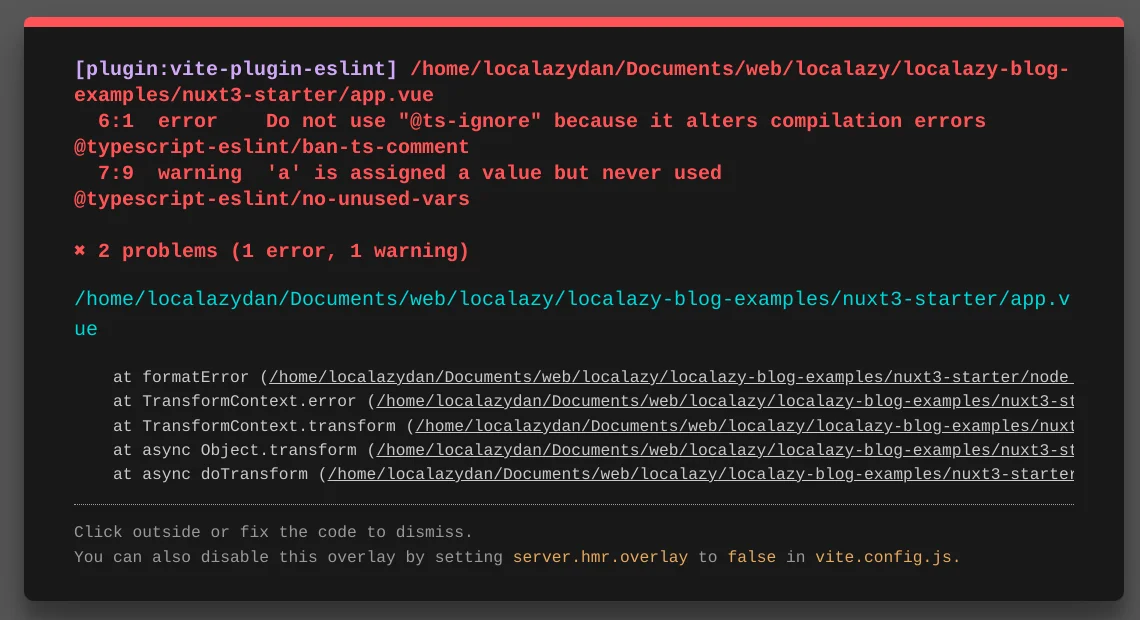
To enable this, install npm install vite-plugin-eslint --save-dev and then adjust the configuration in your nuxt.config.ts.
// nuxt.config.ts
import { defineNuxtConfig } from 'nuxt'
import eslintPlugin from 'vite-plugin-eslint';

export default defineNuxtConfig({
  vite: {
    plugins: [
      eslintPlugin()
    ]
  },
})
🖼️ Add Tailwind
Let's start by installing Tailwind and Nuxt's Tailwind wrapper as dev dependencies: npm install -D tailwindcss @nuxtjs/tailwindcss. Then add @nuxtjs/tailwindcss to the modules section in nuxt.config.ts
// nuxt.config.ts
import { defineNuxtConfig } from 'nuxt'
import eslintPlugin from 'vite-plugin-eslint';

export default defineNuxtConfig({
  vite: {
    plugins: [
      eslintPlugin()
    ]
  },
  modules: [
    '@nuxtjs/tailwindcss',
  ]
})
I had some issues using the recommended npx tailwindcss init command since that creates a .js configuration file, but Nuxt couldn't pick up the content configuration section. Let's create a TypeScript variant instead manually. Create a file called tailwind.config.ts in the root of the project and paste in the following:
// tailwind.config.ts
import { Config } from 'tailwindcss';

export default <Config> {
  content: [
    'app.vue'
    // Add all files that contain Tailwind classes
    // e.g. './modules/**/*.{vue,js,ts}',
  ],
  theme: {
    extend: {},
  },
  plugins: [],
}
The @nuxtjs/tailwind module adds the base Tailwind utility classes behind the scenes for you. If you wish to modify it, refer to the official documentation.
🚩 Add i18n - @intlify/nuxt3
Install the dev dependency by running npm i -D @intlify/nuxt3. Then create lang folder in the root of your project, which we'll use as the localization files source for the i18n module and create the en.json file inside. We'll also set English as the main and fallback locale for the moment. Modify your nuxt.config.ts to accommodate these changes.
// nuxt.config.ts
import { defineNuxtConfig } from 'nuxt'
import eslintPlugin from 'vite-plugin-eslint';

export default defineNuxtConfig({
  vite: {
    plugins: [
      eslintPlugin()
    ]
  },
  modules: [
    '@nuxtjs/tailwindcss',
    '@intlify/nuxt3'
  ],
  intlify: {
    localeDir: 'lang',
    vueI18n: {
      locale: 'en',
      fallbackLocale: 'en'
    }
  }
})
The list of supported languages, as well as the fallback language, will depend on your project.
Learn how you can connect Nuxt 3 to Localazy at translate your project in no time
At this point, when you create some keys in en.json , you'll be able to render them in your application via the $t('...') utility function. Here is an example:
// lang/en.json
{
  "hello_from_localazy": "Hello from Localazy",
  "description": "Nuxt 3 + Tailwind + Eslint + i18n + Sentry Starter"
}
// app.vue
<template>
  <div>
      <h1>`{{ $t('hello_from_localazy') }}`</h1>
      `{{ $t('description') }}`
  </div>
</template>
👁️ Add Sentry
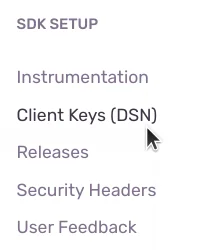
First of all, head to the Sentry website and sign up. Once logged in, create a new project and navigate to its settings, and open Client Keys (DSN). Note down your DSN; we'll need it shortly.
Back in your project, we'll install Sentry as a Vue-based client-only plugin. Firstly, install the required dependencies npm i @sentry/tracing @sentry/vue. Then create plugins folder and sentry.client.ts file inside. Paste in the following and fill in your DSN key.
// plugins/sentry.client.ts
import * as Sentry from '@sentry/vue';
import { BrowserTracing } from '@sentry/tracing';

export default defineNuxtPlugin((nuxtApp) => {
  const { vueApp } = nuxtApp;

  Sentry.init({
    app: [vueApp],
    dsn: '<YOUR-DSN>',
    environment: process.dev ? 'development' : 'production',
    integrations: [
      new BrowserTracing({
        routingInstrumentation: Sentry.vueRouterInstrumentation(nuxtApp.$router)
      })
    ],
    // Set tracesSampleRate to 1.0 to capture 100%
    // of transactions for performance monitoring.
    // We recommend adjusting this value in production
    tracesSampleRate: 1.0,
    beforeSend (event, hint) {
      // Check if it is an exception, and if so, log it.
      if (event.exception) {
        // eslint-disable-next-line no-console
        console.error(`[Exeption handled by Sentry]: (${hint.originalException})`, { event, hint });
      }
      // Continue sending to Sentry
      return event;
    }
  });

  vueApp.mixin(Sentry.createTracingMixins({ trackComponents: true, timeout: 2000, hooks: ['activate', 'mount', 'update'] }));
  Sentry.attachErrorHandler(vueApp, { logErrors: false, attachProps: true, trackComponents: true, timeout: 2000, hooks: ['activate', 'mount', 'update'] });

  return {
    provide: {
      sentrySetContext: Sentry.setContext,
      sentrySetUser: Sentry.setUser,
      sentrySetTag: Sentry.setTag,
      sentryAddBreadcrumb: Sentry.addBreadcrumb,
      sentryCaptureException: Sentry.captureException
    }
  };
});
If you'd like to dive deeper into the configuration, I recommend reading through the official Sentry documentation.
At this point, when an error arises in your application or you'll capture exceptions by hand. We're attaching a couple of Sentry methods to the Nuxt instance, and they are available on the client side through useNuxtApp composable. For example:
// app.vue
...

<script lang="ts" setup>
const { $sentryCaptureException } = useNuxtApp();

onMounted(() => {
  $sentryCaptureException("Test exception");
});
</script>
✔️ Conclusion
Throughout this article, we've integrated and implemented the fundamental tools and modules that will help your Nuxt 3 projects scale easily. Here is the final boilerplate that you can download. Happy coding!
🎁 A gift for you
Use the coupon "lovenuxt" during your Localazy plan checkout and get a 25% discount on your purchase.
Discount applies to Professional, Autopilot, and Agency plans. Enjoy!