Android's strings.xml: Deprecated!

Have you decided to make your Android app multilingual? I guess that even if you haven't yet, you know about strings.xml and values-XX folders. Localizing your app should be easier than handling XML files. And it can be!
Here goes a simple guide on avoiding handling translated XML files at all in a few simple steps. And as a bonus, you get your app translated to up to 80 languages for free by sharing translations with other apps.
Not thinking about localization yet?
You should keep localization in mind early. It's better to have your app prepared for it from the beginning. Believe me. Several times, I was depressed from searching for all the hardcoded strings having a hard time refactoring my code to be prepared for proper localization.
A few minutes you spend with this article will save you hours or maybe days in the future.
The source language
Okay, there's already a localization solution baked into Android, so there's no reason to go against it. Use strings.xml in the values folder for the source language. Btw, I strongly recommend using English.
Just keep doing what's standard and what's recommended by Android Studio, and for what Android Studio can give us insights and useful warnings.
However, completely forget about those values-de-rDE or values-b+zh+Hans+TW folders. You don't need them at all!
1. Sign up for Localazy - It's free
Navigate to Localazy, sign up, and create a new app after the registration.
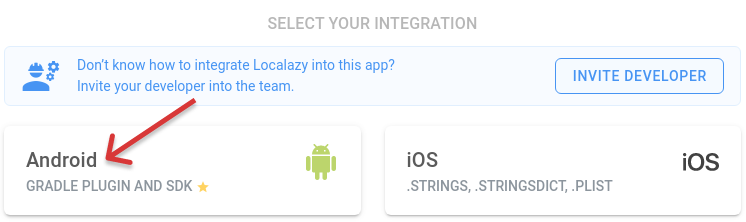
Select the Android integration:
2. Follow the integration guide
It's as simple as adding a few lines to your root's build.gradle (adding a repository and a build plugin):
buildscript {
    repositories {
        maven { url "https://maven.localazy.com/repository/release/" }
    }
    dependencies {
        // ...
        classpath "com.localazy:gradle:1.5.2"
    }
}
And a few lines at the end of your app's build.gradle (configuring and applying a build plugin):
apply plugin: 'com.localazy.gradle'

localazy {
    readKey "secret-read-key"
    writeKey "secret-write-key"
}
It's a matter of about 30 seconds if you know what you do :-). And btw, the Localazy Gradle plugin is highly configurable ;-).
3. Upload strings
Once Localazy is integrated with your app, all you need to do is to upload strings. You can do so from the command-line:
./gradlew uploadStrings
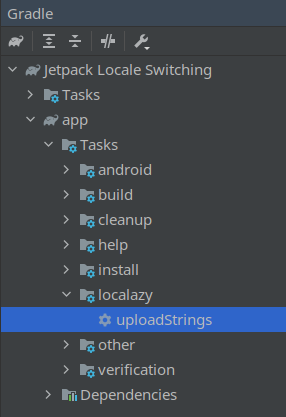
Or from Android Studio using the Gradle view:
Upload your strings whenever you add new ones so that translators can get their hands on them early.
4. Get your app translate
Shortly after you upload your strings, you are offered about 80 languages into which Localazy can automatically translate your app. All you need to do is just to review them so that they can go live.
You can go as far as translating languages you don't know using machine translations. They are completely free with Localazy.
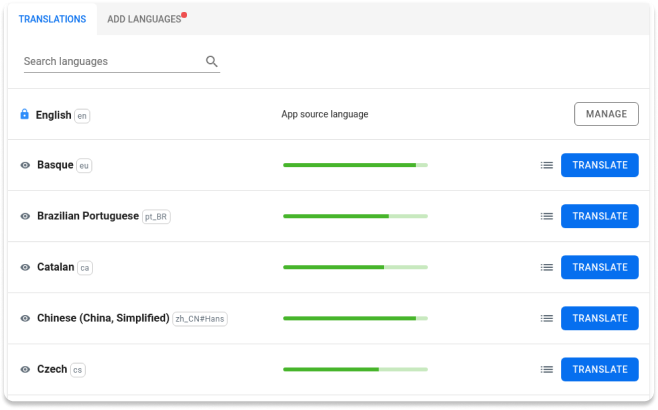
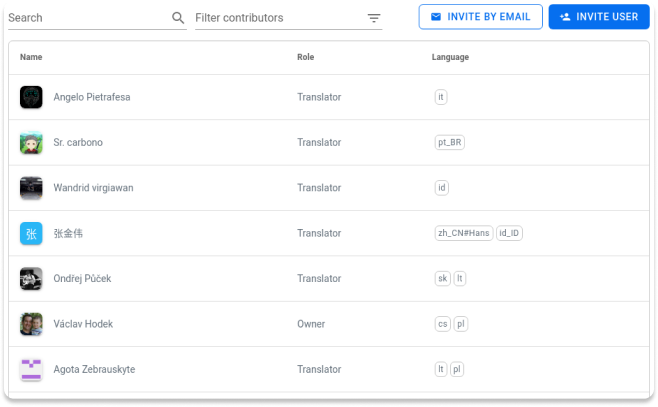
However, I strongly recommend doing so, you can invite your loyal users to Localazy to help you with translating your app to their native languages. With Localazy, you can manage them easily, and the review is here to ensure high-quality translation.
And that's it!
Really! Do you expect another step? Downloading translated files and placing them in the correct values folder? Nothing like this is necessary.
The Localazy Gradle plugin you integrated in the step 2. is taking care of everything for you. When your app is built, it downloads and places translated files into it. Everything is processed during the build, so your source code and resources are left untouched.
Did I promise that you can forget about manual XML files handling? Here it is!
OTA/online updates
And there's more you are about to get. The Localazy Gradle plugin automatically integrates the Localazy Android library with your app. And this small library keeps translations in your app up-to-date, and it can even download new languages. You no longer need to re-submit your app to Play Store just because you need to fix translations or add new languages.
And all of this with no single change to the source code of your app! Everything is done automatically during the build process.
You can disable this feature if you want so, but I recommend using it as it also optimizes the translation and review process, so you spend your time with the most important translations first.
Btw, the Localazy Android library comes with a bunch of nice features, so you can, for example, create a language selector that is always up to date.
And what about you?
Of course, the final choice is yours, but as Localazy is free for usual apps, I'm no longer going to have headaches from all those XML files and values folders. Having like 6 folders for different densities and another set of them for mipmap images is enough for me :-).