Automated Localization of Laravel Projects with Localazy and GitHub Actions

Learn how to fully automate the localization of your Laravel projects with Localazy and GitHub actions in this article.
👋 Introduction
Any developer who has encountered the challenge of localization at least once will tell you that it's a tedious job. I think we can agree that taking care of multiple language versions just isn't as fun as introducing new features to the product you love. And we are not talking only about internationalization but also about managing translators, handling different versions, translation ping-pong, and the countless revisions. That's why localization is often neglected and buried deep in the backlog.
What if we told you that you could completely automate the localization process with Localazy and GitHub Actions? And by completely, we mean completely.
❓ What's Localazy? Localazy is a complete localization suite built with developers in mind. Localazy allows you to fully automate the localization of your Laravel projects. Set it up once and forget about the hassle forever.
You will learn how to:
- install the Laravel Framework and run your first application,
- set up your Git repository,
- prepare your Laravel project for localization,
- connect it with Localazy and translate it into multiple languages,
- automate string uploads and translation downloads with GitHub Actions.
⌨️ Install Laravel framework
There are a couple of ways to install Laravel (choose the one that suits you and your OS). Typically, you'd probably use composer to install the framework. But as I use macOS and want to keep my laptop as clean as possible, I chose to install Laravel via curl, which downloads a containerized application.
This is a huge advantage if you're developing on a Mac and have Docker Desktop up and running - and we know the benefits of dockerized applications (for everyone interested, I recommend reading Docker Deep Dive: Zero to Docker in a single book).
Let's install the application. I typed laravel-i18n-gh-actions-example as the name of my app.
curl -s "https://laravel.build/laravel-i18n-gh-actions-example" | bash
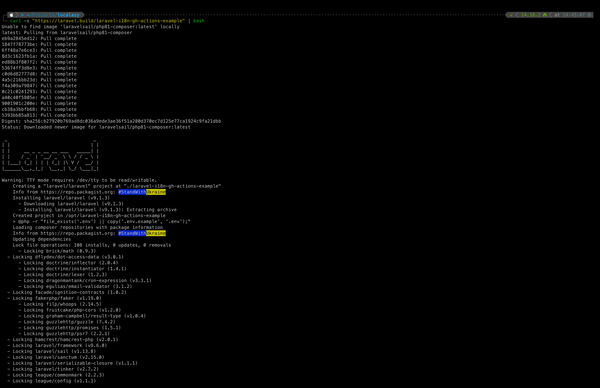
The application is shipped with Laravel Sail, which was introduced with Laravel 8. It's a command-line interface for interacting with Laravel's default Docker development environment. Sail provides a way for building a Laravel application without requiring prior Docker experience.
🕹️ Run the Laravel application
Alright, the project is created. It's time to run the application. Navigate to the application directory and start Laravel Sail.
cd laravel-i18n-gh-actions-example && ./vendor/bin/sail up
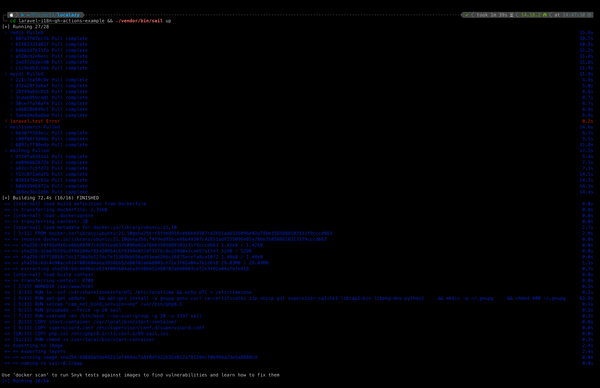
This process runs the application. It can take a while for the first time as application containers need to be built, so be patient. It's good to note - if you're a Docker expert - everything about Sail can be customized using the docker-compose.yml file included with Laravel.
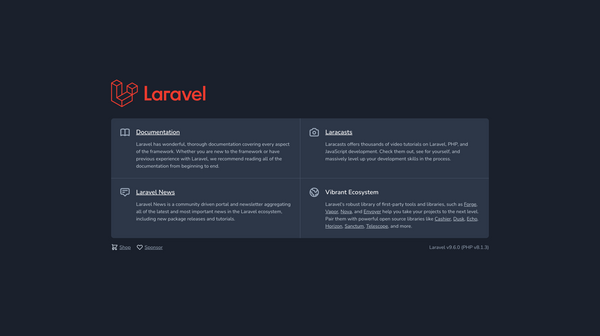
After the application's Docker containers have been started, you can access the application in your web browser at: http://localhost. You should see a screen similar to the one below.
🏷️ Setup Git - what do we want to achieve?
In the following steps, we'll prepare our git repository for the workflow we'll set up later. As you can imagine, there are dozens of workflows suitable for different types of apps - it all depends on your needs.
I'd like to show you a relatively simple example so that you can understand the GitHub Actions. The following steps won't make much sense if you don't know what I want to achieve. So what is it?
Imagine this workflow:
- We have two main branches,
developandmaster, - then, for every task we work on, we create a new branch (depending on the task title - name it
foofor our foo simple task), - in
foobranch, we define new source keys as we work on the task, - when it's ready, we create a pull request to
develop, - at this point, we want the source keys to be uploaded & synced to Localazy for translation,
- meanwhile, translators can work on translations,
- then, when it's time to release the app, we will create a pull request from
developtomaster, - now, when we accept the PR and therefore push to
masterbranch, we want to download the translations (in localization files) and push them to master with the code, and most likely run some other tasks (like test the app, build/ship the app, ...) - depending on your needs, - then, everything is ready.
Create & initialize the Git repository
Now we need to set up a Git. Go to your GitHub and create an empty repository. Copy the remote address and init git in our Laravel project.
git init
Then, add a new remote and paste the copied address.
git remote add origin git@github.com:localazy/laravel-i18n-gh-actions-example.git
Let's push the project to master branch. I use VSCode, so I've done it all in the user interface as it's more convenient, at least for me.
Then, create a develop branch and switch to it. Publish the branch to remote.
git switch -c develop
Now, create a foo branch and switch there. Our Laravel-related code things will be happening here. We'll get there in a moment.
git switch -c foo
🍃 Prepare Blade templates & source translation file(s)
We're in the foo branch, it's time to prepare the Blade template for localization. There are two main approaches to localizing Laravel applications. One uses PHP files, and the second one uses JSON files. You can also combine them both together, which might also be a use case in your project.
Anyway, in this example, we're going to use php files. Translation files are located in the lang directory in the application root. As our source language is English, create a new file in the en directory called welcome.php.
return [
    'laravel' => 'Laravel',
    'home' => 'Home',
    'log_in' => 'Log in',
    'register' => 'Register',
    'documentation' => 'Documentation',
    'documentation_text' => 'Laravel has wonderful, thorough documentation covering every aspect of the framework. Whether you are new to the framework or have previous experience with Laravel, we recommend reading all of the documentation from beginning to end.',
    'laracasts' => 'Laracasts',
    'laracasts_text' => 'Laracasts offers thousands of video tutorials on Laravel, PHP, and JavaScript development. Check them out, see for yourself, and massively level up your development skills in the process.',
    'laravel_news' => 'Laravel News',
    'laravel_news_text' => 'Laravel News is a community driven portal and newsletter aggregating all of the latest and most important news in the Laravel ecosystem, including new package releases and tutorials.',
    'vibrant_ecosystem' => 'Vibrant Ecosystem',
    'vibrant_ecosystem_text' => 'Laravel\'s robust library of first-party tools and libraries, such as <a href="https://forge.laravel.com" class="underline">Forge</a>, <a href="https://vapor.laravel.com" class="underline">Vapor</a>, <a href="https://nova.laravel.com" class="underline">Nova</a>, and <a href="https://envoyer.io" class="underline">Envoyer</a> help you take your projects to the next level. Pair them with powerful open source libraries like <a href="https://laravel.com/docs/billing" class="underline">Cashier</a>, <a href="https://laravel.com/docs/dusk" class="underline">Dusk</a>, <a href="https://laravel.com/docs/broadcasting" class="underline">Echo</a>, <a href="https://laravel.com/docs/horizon" class="underline">Horizon</a>, <a href="https://laravel.com/docs/sanctum" class="underline">Sanctum</a>, <a href="https://laravel.com/docs/telescope" class="underline">Telescope</a>, and more.',
    'shop' => 'Shop',
    'sponsor' => 'Sponsor',
    'laravel_version' => 'Laravel v:version',
    'php_version' => '(PHP v:version)',
];
For the sake of being specific, we can ignore json translation files, so create a .gitignore in the lang directory.
# ignore json files
*.json
As you can notice, the welcome.php file now contains keyed texts from the welcome.blade.php template. Now, replace the strings in the template for the keys we're just defined. Let me mention a couple of examples:
<title>Laravel</title>➡️<title>{{ __('welcome.laravel') }},<div ...><a ...>Documentation</a></div>➡️<div ...><a ...{{ __('welcome.documentation') }}</a></div>,<div ...>Laravel's robust library of...</div>➡️<div ...>{{!! __('welcome.vibrant_ecosystem_text') !!}}</div>,<div ...>Laravel v{{ Illuminate\Foundation\Application::VERSION } (PHP v{{ PHP_VERSION }})</div>➡️<div ...>{{ __('welcome.laravel_version', ['version' => Illuminate\Foundation\Application::VERSION]) }} {{ __('welcome.php_version', ['version' => PHP_VERSION]) }}</div>.
The first two examples are pretty straightforward; this is standard syntax for displaying the translation string.
In the third example, we have to tell Blade not to escape the data. Although, you should be careful when echoing unescaped content as your app might then be vulnerable to XSS attacks.
Fourth example replaces placeholders we use in the welcome.php source language file (:version). To replace the placeholder in the Blade template, pass an array of replacements as the second argument to the __ function.
You can find even more examples including plurals, creating a language switcher (and more detailed explanation) in a great article about How to build a multilingual PHP app with Localazy and Laravel written by Francisco Melo, which was my starting point and an inspiration for composing this post.
Just to test it out, if we refresh our page now - it should look exactly the same as before externalization.
💞 Connect Laravel application to Localazy project
Go to the Localazy signup page and create a free account or log in (if you have already joined our community). Then, name your organization and create a new project.
Select English as the source language. Also, you can enable the Use community translations (ShareTM) option to get some strings translated automatically by Localazy.
On the integrations page, select Laravel integration. Copy the piece of code to the clipboard.
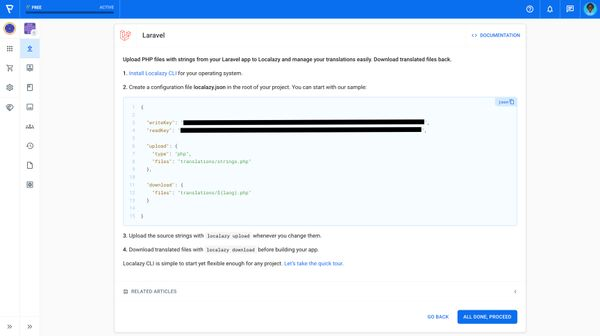
In your project root, create a file called localazy.json. This file serves as a config file for Localazy CLI. The example above (which we'll modify to our needs) is one of the simplest forms of config. There are many ways how to adjust the localazy.json file to your needs, everything is described in detail in our documentation.
Paste the code into localazy.json. This file should be pushed to the Git repository. Although, we should not push the secrets like writeKey and readKey. What do we do? Create one more file in the project root named localazy.keys.json, then cut & paste keys into it. After that, add the latter file to .gitignore, also located in the project root.
# other .gitignore contents...

# Localazy keys
localazy.keys.json
⚙️ Update localazy.json to fit our application
Next, we have to tweak the localazy.json file a little bit in order for everything to work correctly. This is the final look:
{
    "upload": {
      "type": "php",
      "files": "lang/en/**.php"
    },
    "download": {
      "files": "lang/${lang}/${file}"
    }
}
Let me explain: As I've already mentioned, I moved the writeKey and readKey to a separate file, so it's not here anymore. Property called upload.files has changed. The value says that we want to upload all the php files from lang/en directory. Files serve as source language files. A detailed explanation can be found in the Upload reference.
There's a similar change in the download.files section as well. The value of this property instructs CLI to download files with the same name as the uploaded file (placeholder ${file}). Also, files should be grouped into folders by language (placeholder ${lang}). All possible options described in detail can be found in the Download reference.
Alright, commit and push our progress; it's time for the next step.
☝️ Optional: Test upload locally
Just a reminder - we want to automate our workflow with GitHub Actions. If you don't want to test it locally, skip to the next section. But sometimes, developers would like to test the translations during development (I also wanted to make sure I set up everything properly before getting into GitHub actions). So, if you're interested, I'll show you how.
There are many ways to install the Localazy CLI (depending on several factors). I wanted to use the Docker image to test it out, but unfortunately, Apple Silicon chips are not supported yet, therefore I used an installation via NPM.
Localazy advises to install the package to the system globally, although I installed it in the project folder.
npm install @localazy/cli
After that, to test the upload, use:
npx localazy upload -s
The parameter -s stands for simulate. It won't actually upload the strings to Localazy, but CLI will certainly tell you if anything possibly went wrong. All good, everything is set up correctly! We can proceed to GitHub Actions.
🤫 Add secrets to our repository
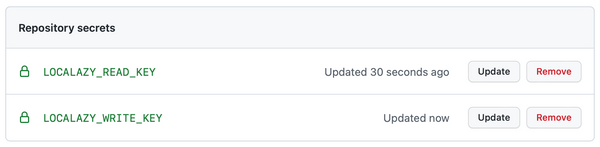
To make GitHub Actions work, we need to create secrets in our repository. Why? Later, when we will be using Localazy Upload and Localazy Download Actions, we need them to read writeKey and readKey from somewhere (in order to access our Localazy project properly). And as we do not want them to be pushed into the repository (reasons described earlier in the article), we'll add them as secrets.
In repo, navigate to Settings -> Secrets -> Actions. I named the secrets LOCALAZY_READ_KEY and LOCALAZY_WRITE_KEY respectively. Assign both its readKey/writeKey value, our configuration should look like this.
📤 Automate Upload with GitHub Actions
In our IDE, create a .github/workflows/upload.yml file. Alternatively, you could do it all from a repository, go to Actions -> New workflow -> Setup a workflow yourself. Name it upload.yml, add the workflow code below and just push it.
This is what the code should look like:
name: Localazy Upload

on:
  push:
    branches: [ develop ]
    paths: [ lang/en/**.php ]

  pull_request:
    branches: [ develop ]
    paths: [ lang/en/**.php ]

  workflow_dispatch:

jobs:
  localazy-upload:
    name: Upload source language strings to Localazy
    runs-on: ubuntu-latest

    steps:
      - uses: actions/checkout@v3
      - uses: localazy/upload@v1
        with:
          read_key: ${{ secrets.LOCALAZY_READ_KEY }}
          write_key: ${{ secrets.LOCALAZY_WRITE_KEY }}
Let's dig into the file and explain it. Just to remind you, the general purpose of this action is to upload new source language strings to Localazy on push or pull_request in(to) develop branch.
Facts:
- We assigned a human-readable name Localazy Upload to the action,
- the
oncontrols when the workflow will run, - we want to trigger the workflow on
pushorpull_requestintodevelopbranch (given bybranches: [ develop ]), - at the same time, we want to trigger the workflow only if any of the source language files changed (given by
paths: [ lang/en/**.php ]), - we'd also like to allow running the workflow manually from the Actions tab (
workflow_dispatch:), - we defined one
job(a workflow run is made up of one or more jobs that can run sequentially or in parallel), - this
jobis calledlocalazy-uploadand has it's human-readable name Upload source language strings to Localazy (which then is displayed in GitHub Actions Workflow), - we specified that the type of runner that the job will run on is
ubuntu-latest, jobconsists of two steps - a sequence of tasks that will be executed as part of the job,- first step
actions/checkout@v3checks out your repository under$GITHUB_WORKSPACE, so your job can access it (documentation here) - second step
localazy/upload@v1reads the config fromlocalazy.jsonand processes uploadwithusingread_keyandwrite_key, read_keyandwrite_keyvalues are read fromsecrets.LOCALAZY_READ_KEYandsecrets.LOCALAZY_WRITE_KEYvariables respectively.
Let's test the workflow now. In our foo branch, commit and push all the changes we've made. Go to GitHub and make a pull request to develop.
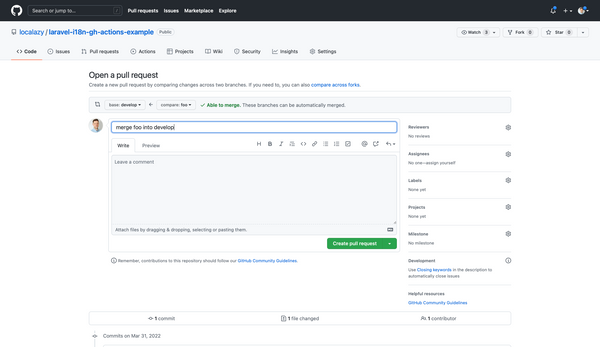
As soon as the pull request is created, our workflow is triggered. You can tell by Some checks haven't completed yet. Also, there's an orange circle next to Localazy Upload workflow, which means it's running.
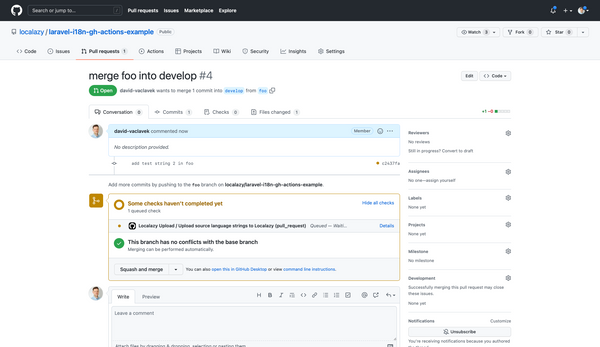
Clicking on Details, we can display the details of the steps of the workflow which is currently running.
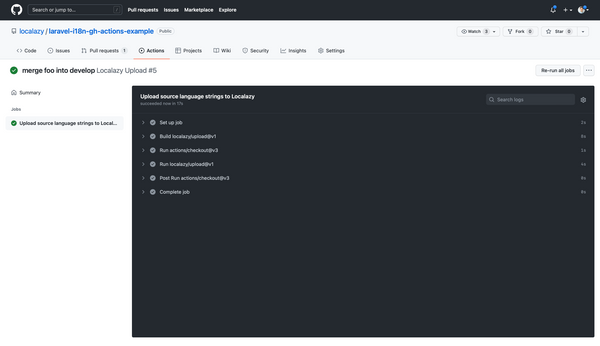
Everything processed correctly! You can also click on an arrow next to each step to see its details. For example, if we click on Run localazy/upload@v1 action output.
Localazy CLI, v1.6.0
Command-line tool for the Localazy platform.

Read more information at https://localazy.com/docs/cli

Parameters:
  - deprecate missing: no
  - import as new: false
  - force current: false
  - filter source: true
  - app version: 0
  - groups: (default only)
  - folder: .

Processing files...

lang/en/welcome.php
(file: welcome.php, lang: inherited, type: php)

lang/en/validation.php
(file: validation.php, lang: inherited, type: php)

lang/en/auth.php
(file: auth.php, lang: inherited, type: php)

lang/en/passwords.php
(file: passwords.php, lang: inherited, type: php)

lang/en/pagination.php
(file: pagination.php, lang: inherited, type: php)

Verifying...

Validating...

Uploading 3 kB...

Upload results: 126 added, 0 updated, 0 deprecated
Using 397 out of 45000 source keys

Your app on Localazy: https://localazy.com/p/laravel-i18n-gh-action-example

Done.
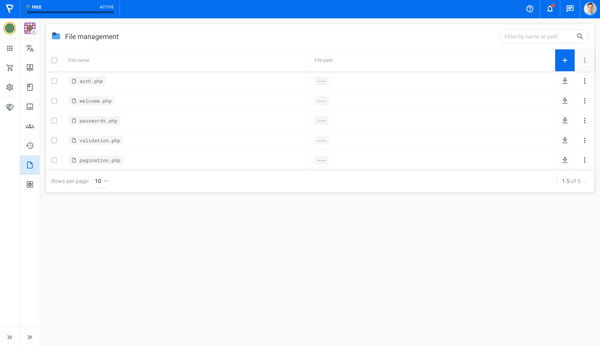
Great, let's go to the application in Localazy and check the File Management section. As we could see, all files are available there.
🚩 Translate your texts in Localazy
Now, add a couple of languages and translate and approve some phrases.
Localazy offers three approaches to choose from and combine to translate your project:
- 💪🏻 Translate on your own or invite contributors - You can start translating on your own and use our built-in suggestion system. Suggestions are drawn from the most popular machine translation engines and the ShareTM mentioned above. To get some additional help as your project grows, you can invite volunteers or translators you already know.
- 🦾 Translate everything in bulk via machine translation - With the Localazy Autopilot plan, you can translate whole files instantly by running a machine translation over the content. This is great for the first iteration and localization testing.
- 🚩 Fully automate the translation process with the Continuous Localization services - Once your Localazy integration is set up, you can order translations from our vetted translators and get your project translated by professionals automatically. The service is also proactive, so you don't have to micromanage translators, and you can visit Localazy only once in a while to check the progress.
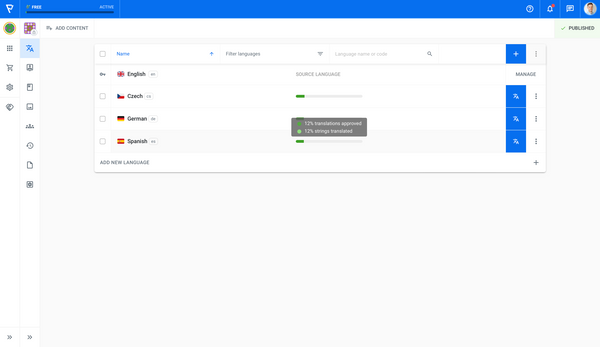
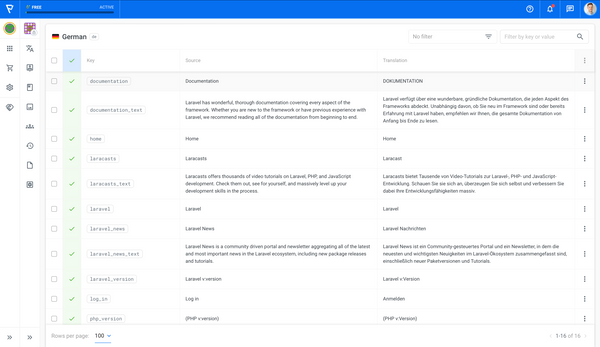
For our purposes, I translated welcome.php it into Czech, German, and Spanish. You can see it all in the following two screenshots.
To summarize, from now on, on every pull request or push to develop, all new or updated source keys will be uploaded to Localazy ready to be translated.
Now, we can merge the pull request and close the foo branch. Then in our IDE, switch back to develop branch and pull updates.
git switch develop && git pull
📥 Automate Download with GitHub Actions
Similarly to upload, we need to create another workflow. Go to the project IDE and create a download.yml file in .github/workflows directory.
name: Localazy Download
on:
  push:
    branches: [ master ]

  workflow_dispatch:

jobs:
  localazy-download:
    name: Download strings from Localazy
    runs-on: ubuntu-latest
    steps:
      - uses: actions/checkout@v3
        with:
          fetch-depth: 0
      - uses: localazy/download@v1
        with:
          read_key: ${{ secrets.LOCALAZY_READ_KEY }}
          write_key: ${{ secrets.LOCALAZY_WRITE_KEY }}
      - run: |
          ls lang/**/**.php
      - run: |
          git config --local user.email "david@localazy.com"
          git config --local user.name "david-vaclavek[bot]"
          git add lang
          git commit -m "Add locale files" -a
      - uses: ad-m/github-push-action@master
        with:
          github_token: ${{ secrets.GITHUB_TOKEN }}
          branch: master
To have the workflows in our blood, let's go through the file once again:
- We assigned a human-readable name Localazy Download to the action,
- the
oncontrols when the workflow will run, - we want to trigger the workflow on
pushtomasterbranch (given bybranches: [ master ]), - we like to allow to run the workflow manually from the Actions tab (
workflow_dispatch:), - we defined one
job(a workflow run is made up of one or more jobs that can run sequentially or in parallel), - this
jobis calledlocalazy-downloadand has its human-readable name Download strings from Localazy (which then is displayed in GitHub Actions Workflow), - we specified that the type of runner that the job will run on is
ubuntu-latest, jobconsists of five steps - a sequence of tasks that will be executed as part of the job,- first step
actions/checkout@v3checks out your repository under$GITHUB_WORKSPACE, so your job can access it (documentation here) - because we will be pushing into another repository, we need to use it
withfetch-depth: 0to prevent errors pushing refs to the destination repository (more information on that can be found in GitHub Push action documentation), - the second step
localazy/download@v1reads thedownloadconfig fromlocalazy.jsonand processes download from Localazywithusingread_keyandwrite_key, read_keyandwrite_keyvalues are read fromsecrets.LOCALAZY_READ_KEYandsecrets.LOCALAZY_WRITE_KEYvariables respectively,- the third step can be skipped, but I just wanted to show you a list of files that were downloaded (
ls lang/**/.phpcommand), - the fourth step sets up a git configuration (
user.email,user.name), - it also adds all the (new) files from
langrepository into staging area (git add lang), - then it commits all the added files,
- fifth step uses action called
ad-m/github-push-action@master, which I've found browsing GitHub Actions Marketplace and is documented here, - this action pushes previously committed files into
masterbranch usingsecrets.GITHUB_TOKENvariable (more info aboutGITHUB_TOKENsecret).
Generally speaking, GITHUB_TOKEN secret is here for security reasons and is created at the start of each workflow run by GitHub. It can be used to authenticate in a workflow run. When the job finishes, it expires.
Okay, now it's time to test our workflow. First, push the newly created file download.yml to remote. Let's create another pull request, this time to master. This time, there's no workflow running when we create a pull request - that's exactly what we wanted.
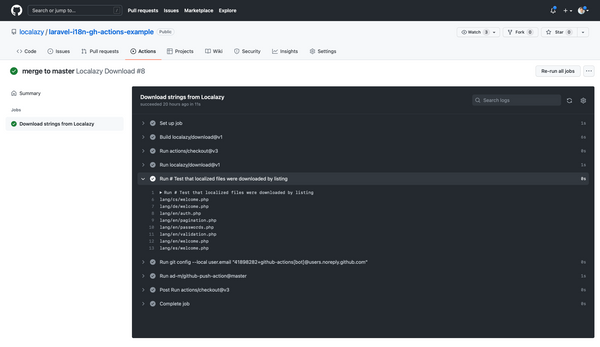
But as soon as we merge the pull request, our workflow will be triggered. When it finishes, we can go through the details of each step. For example, we can see what files we downloaded by localazy/download@v1 action.
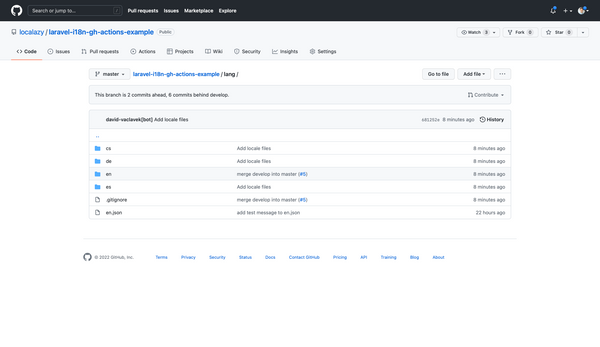
When we check our repository, we can see that the master branch was updated with the new localization files, leaving the develop branch without them. And that's exactly what we wanted to do in this example.
Most of the steps regarding GitHub Actions were taken from Automated Localization: GitHub Actions ❤ Localazy article made by Václav Hodek - thank you for the inspiration.
🎉 The last step - see our translated application
We got to the end of this article. But it wouldn't be completed without showing you the result. We need to tweak the Laravel web routing a bit so it takes passed language into account. Normally, you'd work in a separate branch (maybe foo2?), merge it to develop, test it, then merge it to master or so... But for our purposes, let's just quickly test it.
Let's switch to master in your IDE and git pull the changes. Go to routes/web.php. In this file, you can register web routes for the application. Update the code:
<?php

use Illuminate\Support\Facades\Route;

Route::get('/{locale?}', function ($locale = null) {
    if (isset($locale)) {
        app()->setLocale($locale);
    }

    return view('welcome');
});
With the code above, we tell the app to set its locale if there's a locale parameter in the path. That's it, the rest of it is done automatically. Try some of these URLs:
localhost/en(or simplylocalhost)
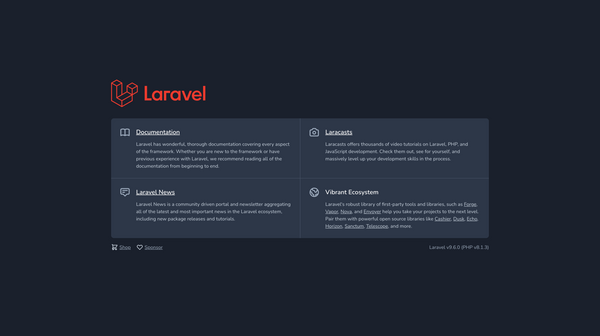
localhost/es
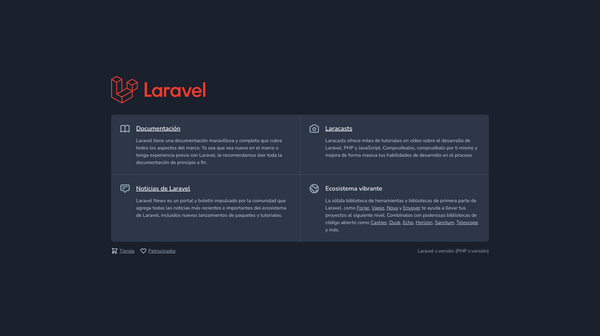
localhost/de
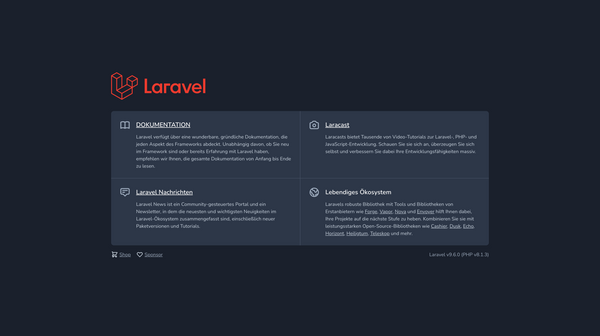
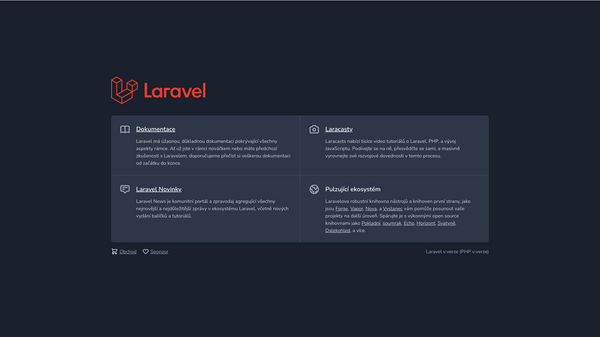
localhost/pl- oops, there's a fallback to English, which is set as a default language (more on that here)
To see if some translations are missing without visiting Localazy, you can use the Laravel Translation Checker. This way, you can be comfortably tucked in your IDE and fully focus on building your Laravel project. But we hope you will say hi and see what's new inside Localazy from time to time.
🎁 Source Code
The source code of this demo project is available on GitHub. Do not forget to explore the content of the .github/workflows folder!
🏆 Localize your Laravel project and get rewarded!
If you were looking for a way to finally localize your Laravel project and got inspired by this article, we would love to hear your story and feature your product on our blog. Bookmark this article and fill in the interview form once you get Localazy up and running.
💰 Bounty offer: If you think you could find a better way of integrating Localazy with the Laravel Framework and would like to develop your own integration, library, or utility, let us know!
✔️ Conclusion
We hope you liked this article showing the power of Localazy and GitHub Actions for Laravel localization. We believe that anything that can be automated, should be automated, and localization is one of those things.
Feel free to contact us at team@localazy.com if you have any questions regarding this tutorial or Localazy in general. You can also join the Localazy Discord to see what other developers using Localazy are up to or accept our invitation to the Localazy Community on GitHub where you will find more community-sourced assets for your Laravel projects you can contribute to. Looking forward to meeting you there!


