Qt localization with Localazy

Qt is a cross-platform toolkit for creating applications with a graphical user interface (GUI). This framework is available under commercial and open-source licences and provides the programmer with many programming tools and pre-made GUI elements that are easy to use.
Qt is commonly used not only for desktops but also for mobile application development.
See the full repository for this article at GitHub.
🆕 New project
Qt can be installed by directly downloading the package from Qt website. It is also available in the commonly used Linux package repositories. The main development tool provided in the Qt toolkit is called Qt Creator. It contains a code and GUI editor and various tools that are making the whole compilation process fairly simple and easy to debug.
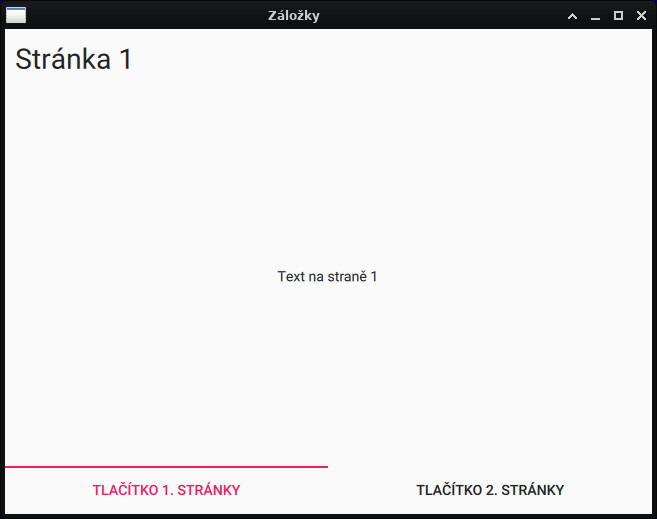
After opening Qt Creator, let’s create a new project (File - New File or Project) and select, for example, the Swipe template which is suitable for mobile development.

🚩 Internationalization
For now, let’s leave all project settings at default values. If you have configured kits for Android development or other target platforms, you can enable them or do so later. It is also possible to enable the translation right away in the initial project settings wizard, but we will add it later manually to cover the whole process since someone might want to add the translations into an already existing project.
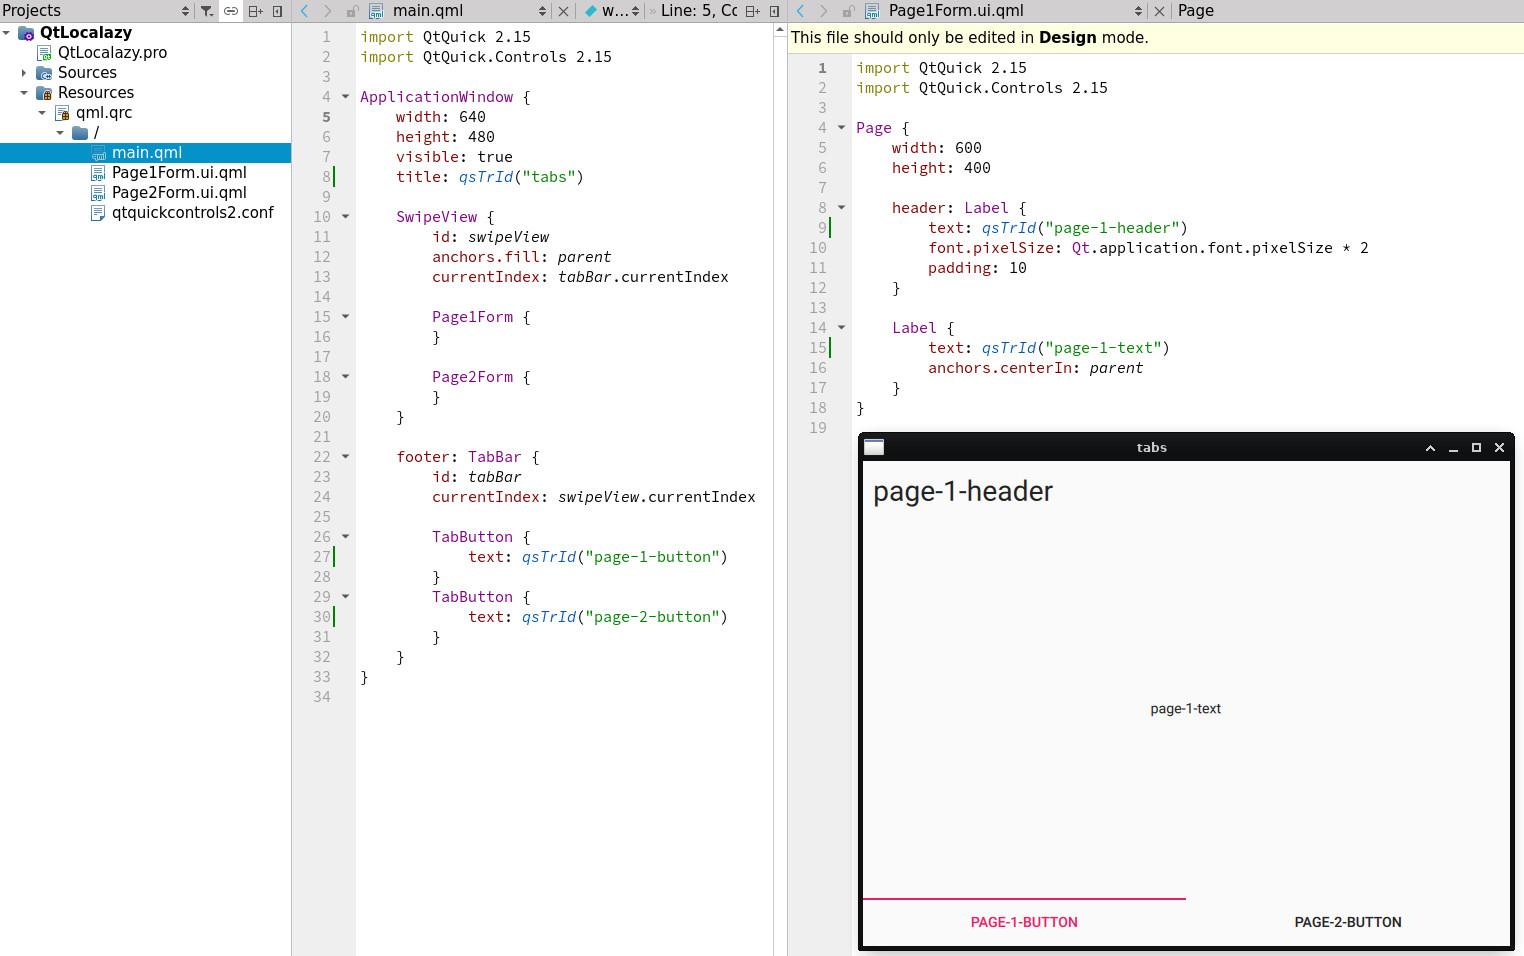
The main qml file already contains some strings in qsTr() function. Instead of writing the string directly in the property, it is passed as a parameter to the function that translates it according to the active language. Even the original strings, however, might change. A good practice to avoid problems in such cases is to use IDs instead of the source language strings. Let’s use qsTrId() instead of the qsTr() function. The string parameters should be unique IDs of the strings. Note that commonly used strings might have the same IDs.
It is a good practice to follow the same pattern when creating the IDs to be able to easily identify where does the given string belong. The edited files with the compiled application might then look like this:
The strings in the application have also changed to the IDs since we have not yet provided the translation strings. First of all, let’s create a directory for the translations and add the expected translation files in the project. Edit the project file (.pro extension) and add the translation files:
RESOURCES += qml.qrc
TRANSLATIONS = translations/EN.ts translations/CS.ts
Two translation files, English and Czech, are now defined. Manually create the translations directory in the project folder and then simply use Tools - External - Linguist - Update Translations (lupdate).
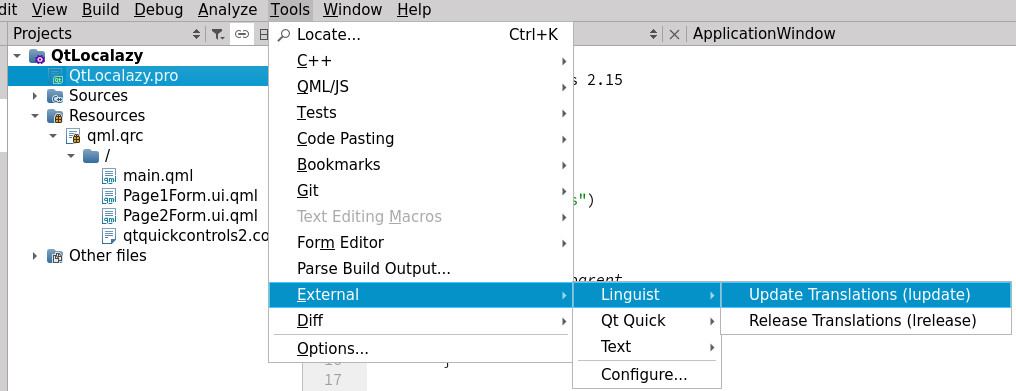
The external tool lupdate generates the translation files and updates them in case of changes. The files can be added to the project by right clicking the qml.qrc file and adding the existing translations directory. The files should then appear in the project file tree.
The .ts files are in XML format where each translation ID has one message element. Moreover, don’t forget to define the language of the file in the header part. Here is an example of one finished and one unfinished translation:
...
<TS version="2.1" language="en_US">
...
<message id="page-1-header">
    <location filename="../Page1Form.ui.qml" line="9"/>
    <source></source>
    <translation>Page 1</translation>
</message>
<message id="page-1-text">
    <location filename="../Page1Form.ui.qml" line="15"/>
    <source></source>
    <translation type="unfinished"></translation>
</message>
...
To see the result and to use the files easily later with Localazy, the source language file should be manually filled. The source language file is now prepared but it is not used in the application yet. This is to be done in the main.cpp file.
A new QTranslator object has to be created, loaded, and installed. Here is the edited main.cpp file:
#include <QGuiApplication>
#include <QQmlApplicationEngine>
//EDIT: include the header
#include <QTranslator>

int main(int argc, char *argv[])
{
    QGuiApplication app(argc, argv);

    QQmlApplicationEngine engine;
    const QUrl url(QStringLiteral("qrc:/main.qml"));
    QObject::connect(&engine, &QQmlApplicationEngine::objectCreated,
                     &app, [url](QObject *obj, const QUrl &objUrl) {
        if (!obj && url == objUrl)
            QCoreApplication::exit(-1);
    }, Qt::QueuedConnection);

    //EDIT: create, load and install translator
    QTranslator translator;
    translator.load(":/translations/EN.qm");
    app.installTranslator(&translator);

    engine.load(url);
    return app.exec();
}
Hmm .qm file? Do we have that in our project? Not yet! The .qm files are the compiled translations that are used in the application. They can be generated in the same way as when generating the .ts files.
If you are not using the ID-based approach, then instead of Update Translations (lupdate) use the Release Translations (lrelease) button. The lrelease tool, however, needs an additional parameter in case of IDs present in the project -idbased. A simple script or command can be executed from the translations directory:
/USE_YOUR_PATH_TO_QT/Qt/6.1.0/gcc_64/bin/lrelease
../QtLocalazy.pro -idbased
The correct path to the Qt installation has to be used to find the lrelease tool. Again, add the newly generated .qm files in the project. Now simply hit the Run button, compile the project and… it’s translated!
❤️ Localazy
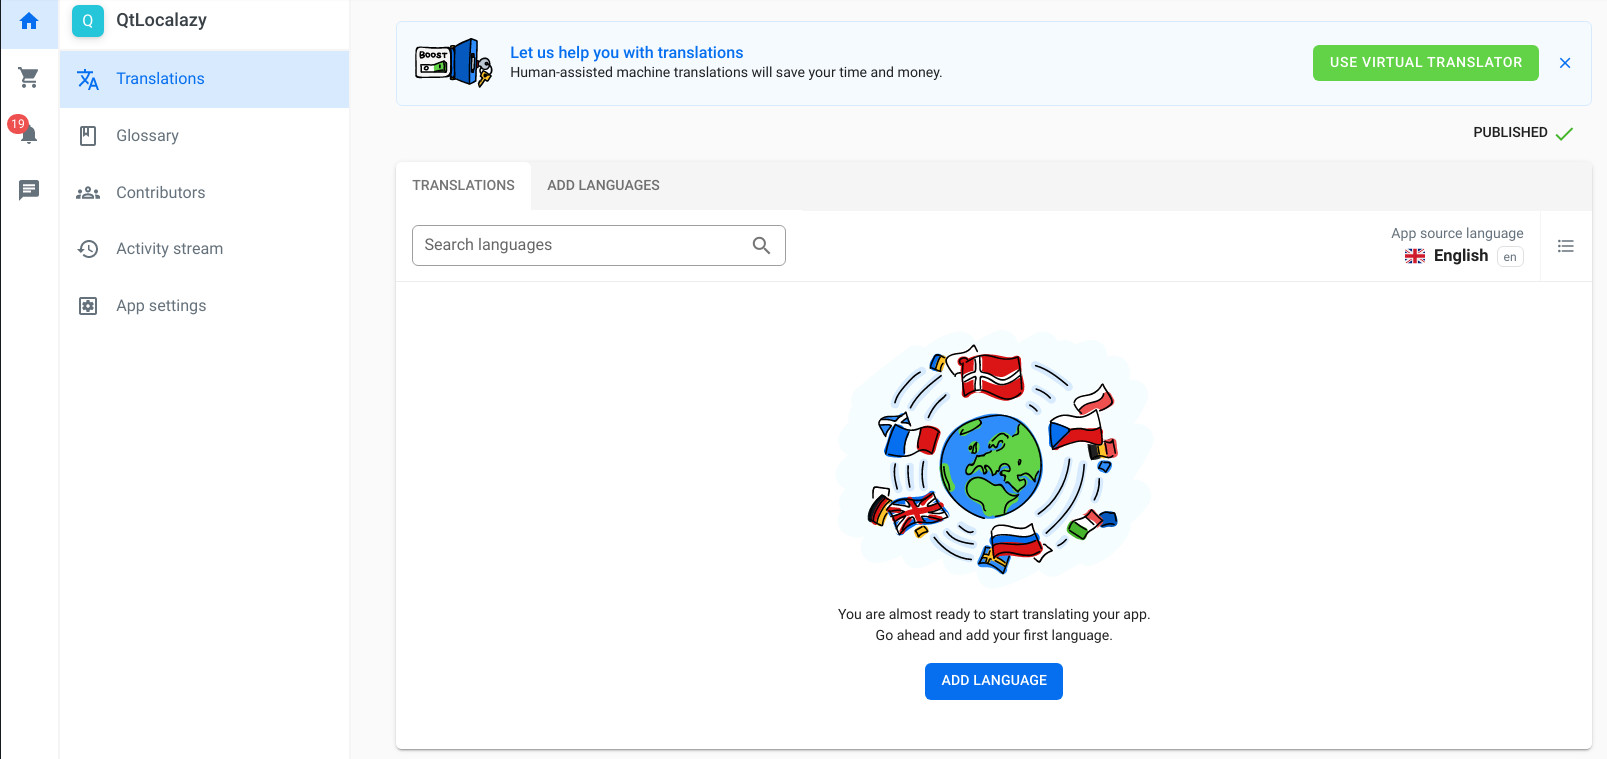
Create Localazy account and install or download the CLI tool. In My Apps section in the Localazy web interface hit the Add new App button, fill the name, and select the source language (English in our case).
Then go to the App settings and get the read and write access keys. The process of managing the translations is quite simple. Simply create a new directory in the translations one (to avoid unwanted overwriting of the translations) and add the configuration file according to the docs.
In our case:
{
  "writeKey": "your-write-key",
  "readKey": "your-read-key",

  "upload": {
    "type": "qt-ts",
    "files": "../EN.ts"
  },

  "download": {
    "files": "./${lang}.ts"
  }
}
Then call the localazy upload command:
PATH_TO_LOCALAZY_CLI/localazy upload
The translation should be present in the Localazy engine now as the source language.
After hitting the Add language button and creating a new translation (Czech in our example). Simply call the CLI again:
PATH_TO_LOCALAZY_CLI/localazy download
A new cs.ts file is now in the directory. Simply replace the CS.ts file in the translations directory with the downloaded file. Instead of EN.qm load the CS.qm in the translator:
translator.load(":/translations/CS.qm");
Compile the translations again (lrelease) and run the application:
👍 Afterword
The described example project shows how to simply add and load a translation in cooperation with Localazy service. To be able to dynamically change the language in runtime, the whole translator management should be moved into a standalone C++ class with callable member functions from QML.
In such a way, multiple translators can be loaded and one of them can be installed according to the selected language. Later, the active one can be removed and replaced by another one without the need to restart the application.
This article has been produced by a member of the developer team at Nepanikar.eu. Thank you.